RabbitMQ with SSL
Updated on 20 Sep 2023
I am using this project to generate the SSL certificates. GitHub - rabbitmq/tls-gen: Generates self-signed x509/TLS/SSL certificates useful for development
tls-gen instruction
cd basic
make
You end up with many files in the result directory, however we are only interested in 3.
- server_server4_certificate.pem
- server_server4_key.pem
- ca_certificate.pem

Create ssl directory
Create a ssl directory in the /etc/rabbitmq folder. Copy those 3 files over to the ssl directory and make sure they have the appropriate owner/group.
Create rabbitmq.conf file
Now we need to create a rabbitmq.conf file in the /etc/rabbitmq directory. The contents of that file will look something very similar to what is shown below. Note that line 10 we have the option of deactivating non-TLS listeners. I.e. we must use SSL.
/etc/rabbitmq/rabbitmq.conf.
loopback_users = none
ssl_options.cacertfile = /etc/rabbitmq/ssl/ca_certificate.pem
ssl_options.certfile = /etc/rabbitmq/ssl/server_server4_certificate.pem
ssl_options.keyfile = /etc/rabbitmq/ssl/server_server4_key.pem

ssl_options.versions.1 = tlsv1.3
listeners.ssl.1 = 5671

# deactivates non-TLS listeners, only TLS-enabled (activated) clients will be able to connect
#listeners.tcp = none
stomp.listeners.tcp.1 = 61613
stomp.listeners.ssl.1 = 61614
ssl_options.verify = verify_none
#ssl_options.depth = 1
stomp.ssl_cert_login = false
#ssl_cert_login_from = server4

web_stomp.ssl.port = 15673
web_stomp.ssl.certfile = /etc/rabbitmq/ssl/server_server4_certificate.pem
web_stomp.ssl.keyfile = /etc/rabbitmq/ssl/server_server4_key.pem
web_stomp.ssl.cacertfile = /etc/rabbitmq/ssl/ca_certificate.pem
web_stomp.ssl.versions.1 = tlsv1.3
If we use the following command, we’ll get a list of listeners that rabbitmq is listening to
sudo rabbitmq-diagnostics listeners
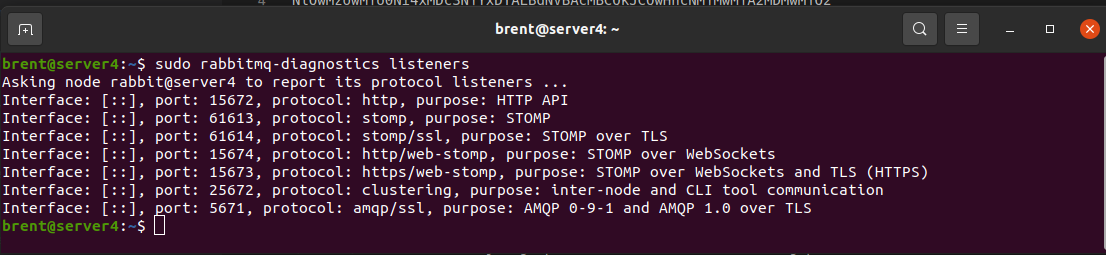
and we’ll see the ssl ports related to stomp listed.