Users and Groups in Ubuntu
Updated on 28 Dec 2018
Many of the options and can be found on the official manpage here: Link to Git
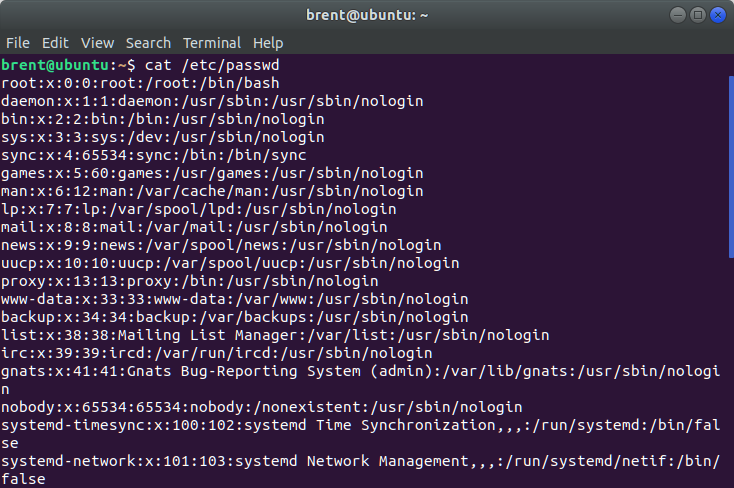
View users
You can see the users on your system by looking at the /etc/passwd file
cat /etc/passwd
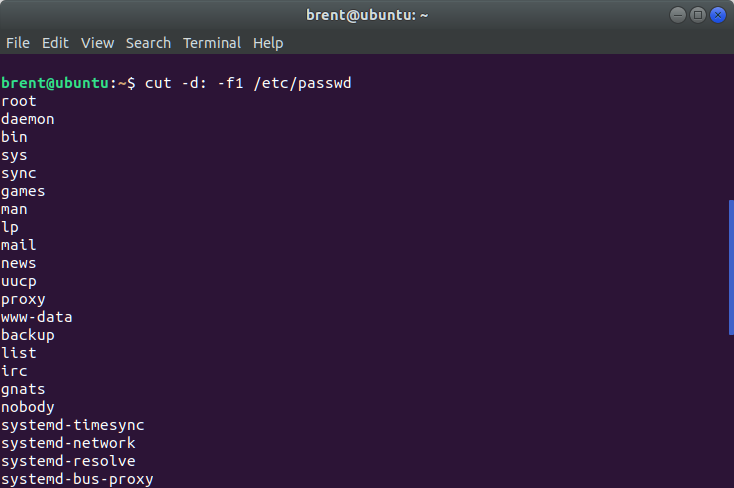
This gives you a whole list of data that might clutter what you really want to see. In this case, we can use the cut command.
cut -d: -f1 /etc/passwd
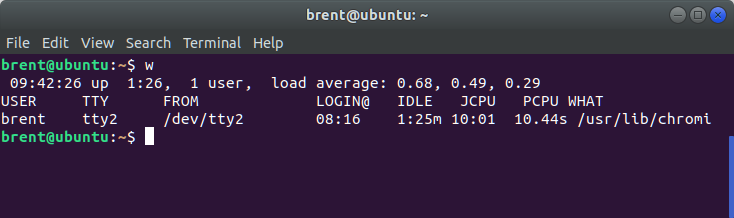
Currently logged in users
You can see who is currently logged onto the system by a really simple command. The w command.
Add a normal user
There are two commands that can be used to add a user. useradd and adduser. We are going to use the more friendly version of adduser.
A normal user is a person that will have a login account and will be able to log into the system. This will create a user mama and a group mama.
adduser mama
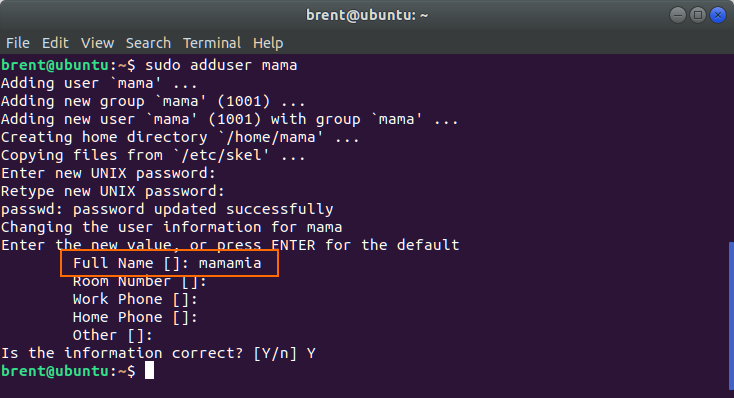
Next time you turn the machine on, you’ll have a new user that you can select. Notice that the fullname we used above, is also the login name we are presented with below.

Add a system user
A system user does not have a login. We can add a system user with the following command
adduser --system mama
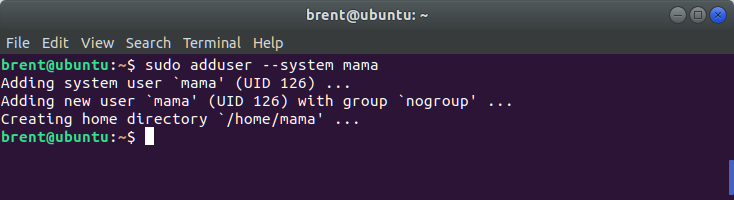
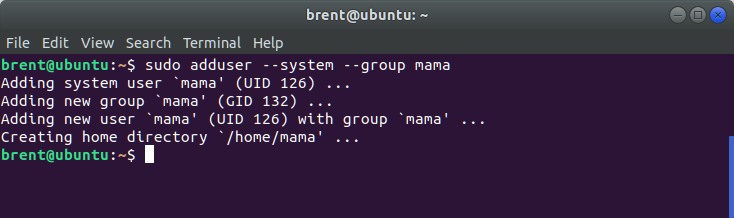
By default this will create a system user with a nogroup assignment. You can specify additional options:
--ingroup- specify an existing group for the user to be assigned.--group- create a new group for the user to be assigned.
Example shown below
adduser --system --group mama
Delete a user or group
We can delete a user or group with the following commands
deluserdelgroup
Example shown below
deluser mama
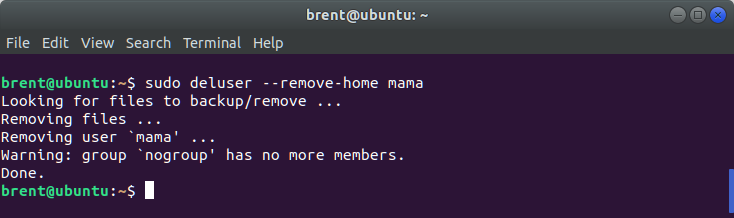
The above will delete the user account mama, however the home directory will remain intact. If you wanted to remove the home directory as well, use the --remove-home option.
deluser --remove-home mama
Other options can be found on the manpages
Add a New Group
If you want to create a new group on your system, use the groupadd command.
sudo groupadd mynewgroup

Add an Existing User Account to a Group
To add an existing user account to a group on your system, use the usermod command.
usermod -a -G groupname username

Change a User’s Primary Group
While a user account can be part of multiple groups, one of the groups is always the “primary group” and the others are “secondary groups”. The user’s login process and files and folders the user creates will be assigned to the primary group.
To change the primary group a user is assigned to, run the usermod command. This time specifying lowercase -g instead of uppercase like we did with the previous example.
usermod -g groupname username
Note the -g here. When you use a lowercase g, you assign a primary group. When you use an uppercase -G , as above, you assign a new secondary group.

View the Groups a User Account is Assigned To
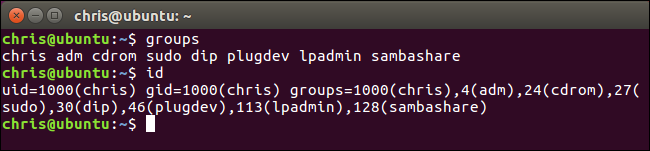
To view the groups the current user account is assigned to, run the groups command. You’ll see a list of groups.
groups
To view the numerical IDs associated with each group, run the id command instead:
id
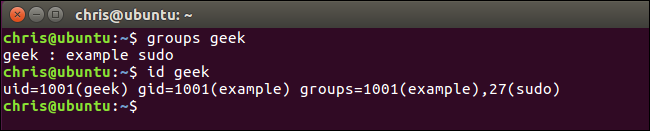
To view the groups another user account is assigned to, run the groups command and specfy the name of the user account.
groups username
You can also view the numerical IDs associated with each group by running the id command and specifying a username.
id exampleusername
The first group in the groups list or the group shown after “gid=” in the id list is the primary group for the account.
View All Groups on the System
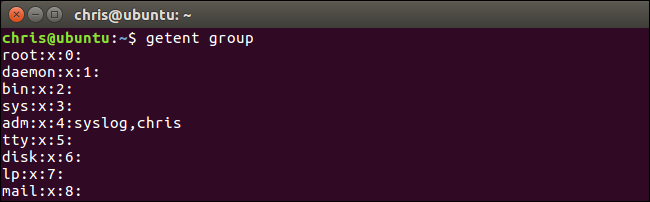
If you want to view a list of all groups on your system, you can use the getent command:
getent group
This output will also show you which user accounts are members of which groups. So, in the screenshot below, we can see that the user accounts syslog and chris are members of the adm group.
Change your password
You can change your password with the following command.
passwd
Change someone else password
If you have sudo privileges on the system, then you’ll be able to change someone else’s password.
sudo passwd other_user